Have you seen our latest issue of LDS Living? It features Latter-day Saints who have made an impact in the culinary world, and here they share some of their favorite recipes with LDS Living readers!
► You may also like: 14 Latter-day Saints stirring things up in the culinary world
Recipes
Christy Spackman: Apple Tart
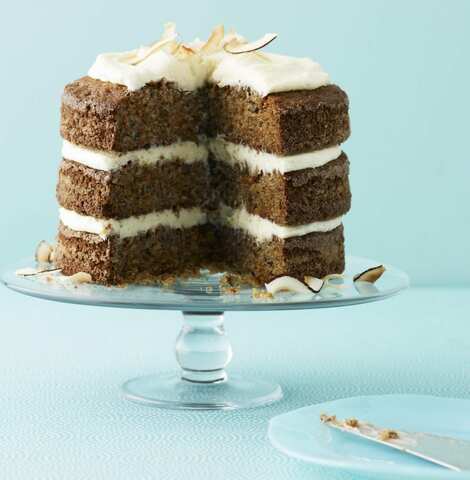
Tara (Teaspoon) Bench: Ginger-Coconut Carrot Cake
Todd Leonard: Braised Beef Tri-Tips
Oh Sweet Basil: Instant Pot Award-Winning Chili Recipe
Megan Faulkner Brown: Meg's Chocolate Chip-Happy Cookies
Carmell Childs: DOLEightful Tropical Berry Sticky Rice with Mango Passion Coulis
Rachael Hutchings: Kimchi Yakisoba
Our Best Bites: BBQ Bacon Sliders with Blue Cheese and Crispy Onions
Christy Spackman: Apple Tart
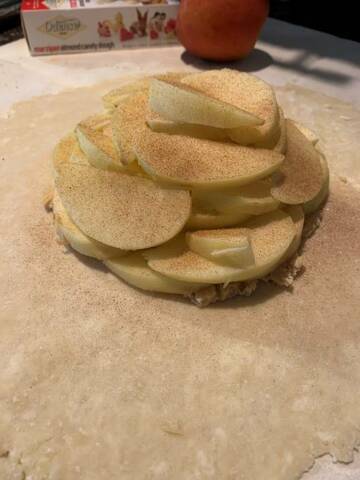
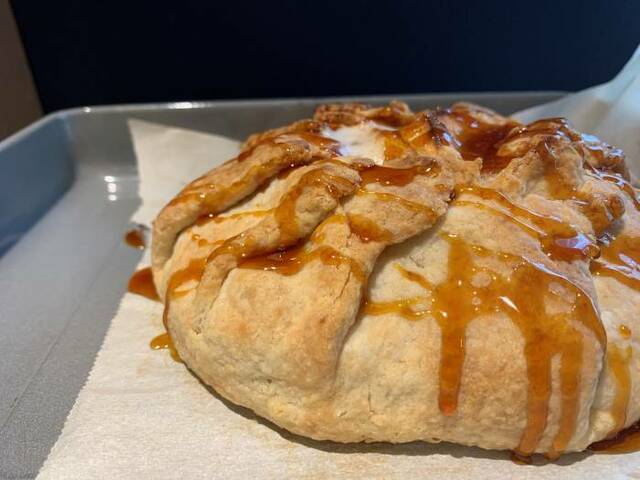
(Editor's note: See a picture of the finished Apple Tart at the top of this article.)
Ingredients:
- One 9" pie crust
- 2 apples, preferably one sweet, one Granny Smith
- 1 oz. marzipan
- ¼ cup sugar (for caramel) + some extra (1 Tbsp. should do) for the apples
- Salt
Ingredients for pie crust (pie crust adapted from Dorie Greenspan's "Good for Almost Everything Pie Dough”):
- 1 ½ cups all-purpose flour
- 2 Tbsp. sugar
- Pinch salt
- 1 ¼ sticks very cold, unsalted butter cut into small pieces
- 1 Tbsp. sourdough starter (optional)
- 2 Tbsp. cream
- Scant 1/4 cup ice water
Instructions:
Pulse together flour, sugar, salt, butter, and sourdough starter in a food processor until the butter is approximately the size of green peas and rice.
Pulse in the cream and 2 Tbsp. of the water, check the hydration, and add more water as needed. The dough should form soft "curds" and stick together when pinched but will look a little dry to the eye.
Dump the dough out of the processor and onto a work surface. If you like your crust very thick, this is good for one crust; if you like it thin, it is good for two. Form into one or two flattened disks about 2" across and 1" high, wrap tightly, and refrigerate for at least an hour before using.
Filling:
Peel and cut apples into even slices. Toss with a tsp or so of sugar, a pinch of cinnamon or nutmeg if you like, a pinch of salt, and a dash of lemon juice or lemon zest if you have it on hand.
Roll out the marzipan into a 6" diameter round
Assembling, baking and finishing:
Bake time and temperature
Oven 425° F
Bake for 20 minutes
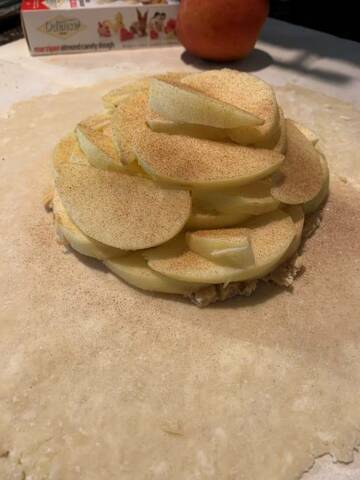
1. Roll out the pie crust to approximately 10" diameter on a lightly floured surface (I like to use a pastry cloth). Place the dough on a piece of parchment paper on a jelly roll pan. Center the marzipan round in the middle of the dough.
2. Arrange the apples in a circular pattern on top of the marzipan. You can do this loosely or tightly—my perfectionist self takes great pleasure in a tight, ordered pile.
3. Fold the remaining dough up and around the apples and marzipan. The dough will not completely cover the apples; that is okay! Sprinkle the top with sugar if desired, then pop into the oven. If you live somewhere hot and have a nice glass baking dish, you can microwave this for 10 minutes and then pop it into the oven to finish.
4. Once the tart has cooked—and you can tell it's done by the dough turning a golden brown and the apples starting to collapse down—take it out and let it start cooling.
5. While it cools, make a dry caramel in a sauté pan. I do this by evenly sprinkling sugar across the bottom of the pan and putting it on medium heat. As the sugar starts to melt, I sprinkle a bit more on, until I have sprinkled the entire 1/4 cup of sugar into the pan.
6. Swirl around (but don't stir!) until it turns a medium to dark caramel color, then remove from the heat and immediately drizzle over the tart. Be careful! It's hot!
7. Wait until the caramel has cooled and serve with a dollop of whipped cream or ice cream.
Tara (Teaspoon) Bench: Ginger-Coconut Carrot Cake
Makes 12 servings
Ingredients:
- - 1 ¾ cups granulated sugar plus more for pans
- - 2 ½ cups all-purpose flour
- - 2 tsp. cinnamon
- - 2 tsp. baking powder
- - 1 tsp. baking soda
- - ¾ tsp. salt
- - 4 eggs
- - 2 Tbsp. grated fresh ginger
- - 1 cup vegetable or canola oil
- - 3 cups grated carrots
- - ½ cup chopped pecans
- - 1 ½ cups toasted sweetened coconut
- - Large coconut shavings toasted
Cream Cheese Frosting
- - 8 oz. cream cheese softened
- - ¾ cup unsalted butter softened
- - 1 lb. 4 cups confectioners' sugar
- - 1 tsp. vanilla
Instructions:
1. Heat oven to 350˚ F. Grease three 8-inch round cake pans; line bottom of pans with parchment. Grease and sprinkle with granulated sugar, tapping out excess; set aside. Stir together flour, cinnamon, baking powder, baking soda, and salt; set aside.
2. Beat eggs and granulated sugar until light. Add ginger and oil. Stir in flour mixture. Fold in grated carrots, pecans, and sweetened coconut.
3. Divide batter among three pans and bake for 25–30 min or until cakes bounce back when touched in the center. Cool 15 min. Turn cakes out of pans and cool, top sides up.
4. For Frosting: Beat together cream cheese and butter until smooth. Add confectioners’ sugar and vanilla and beat just until combined and smooth.
5. Assemble cakes on platter, spreading the center of each cake with a generous layer of frosting. Garnish with coconut shavings.
Notes:
Lining the cake pans with parchment is key! Simply trace the shape of the pan on the paper and cut.
Check out Tara's first cookbook, Live Life Deliciously, here.
Todd Leonard: Braised Beef Tri-Tips
Makes 12 servings
Ingredients:
- - 2 Tri-Tips top sirloin, cleaned and trimmed and cut into 12 portions
- - 1 ½ cups of a.p. flour, add pit seasoning to it and dredge the Tips
- - 2 tablespoons pit seasoning
- - 1 cup red burgundy wine
- - 1/2 gallon enriched brown veal stock
- - 1 large diced yellow onion
- - 1 large diced carrot
- - 2 ribs diced celery
- - 2 tablespoons minced garlic
- - 2 tablespoons minced shallots
- - 1 sprig rosemary or thyme, broken into small pieces
- - 1 cup tomato puree
- - 2 tablespoons Worcestershire sauce
- - Salt and pepper to taste
Instructions:
1. After cleaning and trimming the tri-tips, and the other parts of the recipe are prepped as specified, preheat a brazier or rondeau.
2. Dredge the tri-tips lightly in the seasoned flour and sear with a little fat in the pre-heated rondeau.
3. After the Tips have been browned on all sides and you are feeling good! remove the tips from the pan and add the mirpoix (carrots, onions, celery) to the pan and sweat down and caramelize.
4. Add the garlic, shallots and any herbs you wish and stir for a second or 30.
5. Deglaze the pan with the red wine and reduce by half, add the brown stock and bring to a simmer.
6. Add the tips back into the sauce, season and taste.
7. Place in a 325° F oven for about 3 hours covered.
8. Stir a couple of times during the cooking process so you can see the love forming.
9. After the tips are tender and you feel proud of them, remove them from the oven and the sauce they are in and keep them in a warm place.
10. Strain the sauce as needed, season as needed, and then reduce to thicken as needed.
11. Pour the finished sauce back over the tips or serve on the side.
Notes: You may wish to tighten the finished sauce with a slurry or a roux.
Oh Sweet Basil: Instant Pot Award-Winning Chili Recipe

Instant Pot Chili that is award winning and bringing home chili cook-off victories across the country. You don’t want to miss our best chili recipe ever!
Ingredients:
- - 1 ½ pounds ground beef
- - 6 strips of good quality bacon, chopped
- - 1 (15 oz.) can kidney beans, drained
- - 1 (15 oz.) can pinto beans, drained
- - 1 (15 oz.) can black beans, drained
- - 1 (15 oz.) can fire-roasted diced tomatoes with juice
- - 1 (6 oz.) can tomato paste
- - 1 large red onion, chopped
- - 1 red bell pepper, seeded and chopped
- - 1 jalapeño seeded and minced *optional
- - 2 cups beef stock
- - 1 Tbsp. dried oregano
- - 2 tsp. ground cumin
- - 2 tsp. kosher salt
- - 1 tsp. ground black pepper
- - 1 tsp. smoked paprika
- - 2 Tbsp. chili powder
- - 1 Tbsp Worcestershire sauce
- - 1 Tbsp minced garlic
For Garnish
- - Sour cream
- - Cilantro
- - Shredded cheese
Instructions:
1. Turn your instant pot to sauté and add the bacon.
2. Cook until crisp, stirring often to cook evenly.
3. Remove the bacon to a paper towel lined plate.
4. Add the onions and peppers and cook until tender.
5. Add the meat and cook until browned.
6. Drain off any excess grease, we just tilt the pot and use a large spoon.
7. Add all of the remaining ingredients and 3/4 of the bacon and stir to combine.
8. Turn the instant pot to chili (if you don't have a "chili" setting, use the "manual" setting) and cook for 18–20 minutes.* Allow pressure to release for 10–15 minutes or quick release with the vent.
9. Serve with limes, sour cream, cheese, and a little bacon!
Notes: For the stove: Cook everything in the pot just like you do for the instant pot and then allow to simmer on low heat for 3 hours. For the cooker: Cook the onion and peppers and set aside on another plate. Drain any excess grease and add the meat, cooking until browned. Add everything into the pot, leaving out a little bacon for garnish, and cook on low for 5-6 hours or on high for 3 hours. Most batches will be done after 18 minutes, however, we’ve had a few times when the flavor just wasn’t there yet, so feel free to pressure cook a little longer for more flavor if your beans are not as tender as you’d like. To freeze, cool the chili completely. Place in a large Ziploc bag or FoodSaver, removing all air and freeze laying flat up to 2 months.
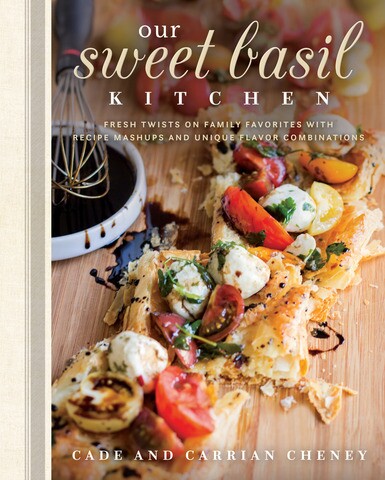
Check out the Our Sweet Basil Kitchen cookbookat Deseret Book stores and on deseretbook.com!
Megan Faulkner Brown: Meg's Chocolate Chip-Happy Cookies
Ingredients:
- - 1 cup unsalted butter, softened
- - 1 cup brown sugar, packed
- - ¾ cup powdered sugar
- - 1 large egg, slightly beaten
- - 2 tablespoons milk
- - 1 tablespoon vanilla extract
- - 3 ½ cups all-purpose flour
- - 1 teaspoon baking soda
- - ½ teaspoon salt
- - ¾ cup milk chocolate chips
- - ¾ cup semi-sweet chocolate chunks
- - ¾ cup Sweet Tooth Fairy® Cocoa Meltables®
- - ¾ cup Sweet Tooth Fairy® Dark Cocoa Meltables®
- - ½ cup dark chocolate chunks
- - ¼ cup rainbow sprinkles
- - ½ cup white sugar crystals
Instructions:
1. Preheat oven to a temperature of 350 F°. Line baking sheet with parchment paper and set aside.
2. In a large mixing bowl, add the butter and mix on medium speed until creamy and smooth for about 1 minute.
3. Add the brown sugar and powdered sugar and cream ingredients together on medium speed until light and fluffy, about 2–3 minutes. Stop the mixer and scrape down the sides of the bowl with a spatula.
4. Add the egg, milk, and vanilla extract and mix ingredients together on low speed until they are evenly mixed.
5. Increase mixer speed to medium and mix until light and fluffy for about 2–3 minutes.
6. In a separate medium bowl, add flour, baking soda, and salt. Whisk dry ingredients together until well combined and gradually pour into the wet mixture, adding a little bit at a time.
7. Mix on low speed until everything is completely blended together and stop the mixer and scrape down the sides of the bowl with a spatula.
8. Add milk chocolate chips, semi-sweet chocolate chunks, Sweet Tooth Fairy® Cocoa Meltables®, Sweet Tooth Fairy® Dark Cocoa Meltables®, and ½ cup dark chocolate chunks and mix together on low speed until chips are well dispersed throughout the dough.
9. Form the dough into mega round balls either by using a 4-ounce cookie scoop or rolling them into about ½ cup-sized portion.
10. In a shallow dish, place the sugar (in a pinch, I use regular granulated sugar!)
11. Roll the top of each dough ball in the sugar crystals.
12. Ideally, chill the dough balls for 30 minutes.
13. Place dough balls on prepared baking sheet, leaving space between the dough balls to allow for spreading.
14. Bake the cookies for 12–15 minutes or until lightly browned and almost set.
15. Allow cookies to cool on the baking sheets for a few minutes before moving to a wire rack to cool completely.
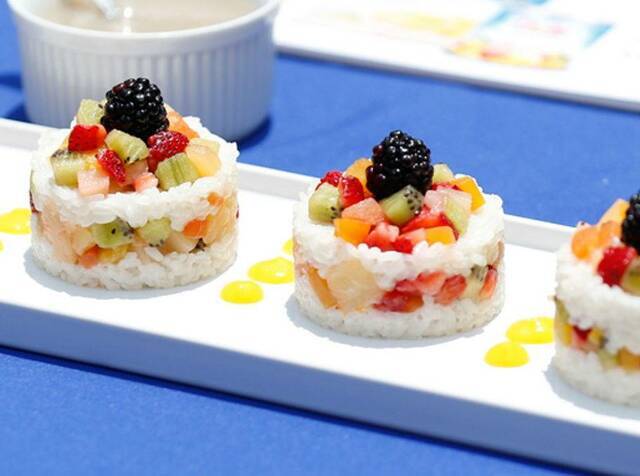
Carmell Childs: DOLEightful Tropical Berry Sticky Rice with Mango Passion Coulis
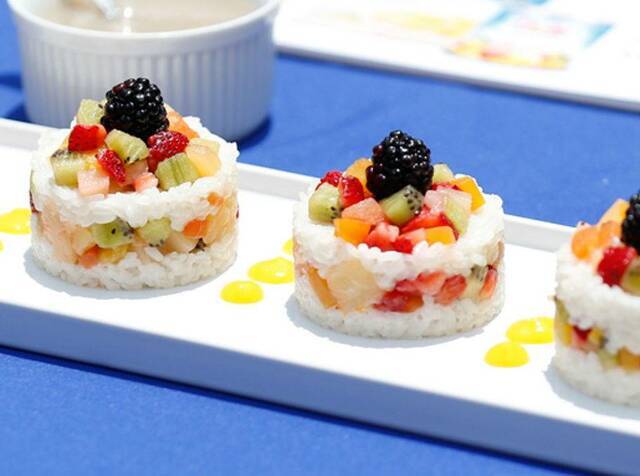
This is a recipe I created for DOLE. It was selected as 1 of 3 finalist recipes.
Makes 6 servings
Ingredients:
- - 1 ½ cups short-grain rice
- - 2 cups water
- - 1 ¼ teaspoons salt, divided
- - 1 can (13.5 oz.) coconut milk
- - 1 cup sugar
- - 1 can (15.25 oz.) DOLE® Tropical Fruit
- - 8 oz. DOLE Strawberries
- - 2 kiwis
- - 1 cup frozen DOLE Mango Chunks, partially thawed
- - 6 oz. DOLE Blackberries
Instructions:
1. Prepare the rice according to package directions with water and 1/2 teaspoon salt in medium saucepan over the grill burner. Drain fruit, reserving juice for mango sauce.
2. Combine coconut milk, sugar, and remaining salt in heavy sauce pan. Bring to boil, stirring constantly; set aside and allow to cool. In a large bowl, combine cooked rice and 1 1/4 cups coconut sauce; toss with a fork until blended and set aside until sauce is absorbed, about 10–15 minutes.
3. Dice tropical fruit, strawberries, and kiwis into 1/4-inch cubes. Combine in a small bowl; set aside.
4. Add thawed mango chunks and 1–2 tablespoons reserved tropical fruit juice to blender. Cover; blend until smooth, adding more juice if necessary.
5. Assemble sticky rice with an empty mandarin orange can or ring mold. Layer 1/3 cup sticky rice, pressing gently into the mold, then layer 1/4 cup diced fruit, and top with another 1/3 cup of rice in ring mold. Slowly remove the ring mold by sliding up the rice. Repeat this process 5 times, rinsing the ring mold after each time. Top molded rice stacks with remaining diced fruit and a blackberry in the center.
6. Garnish plates with mango coulis and drizzle with remaining coconut sauce.
Rachael Hutchings: Kimchi Yakisoba
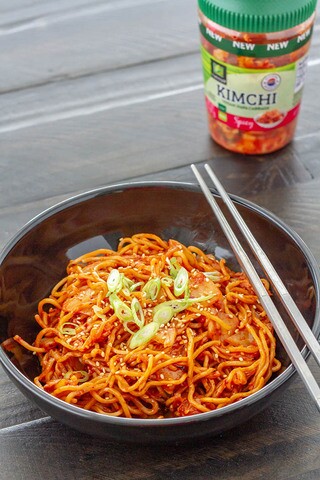
Yakisoba is a Japanese stir-fried noodle dish that is a popular food sold at food stalls at festivals in Japan. This is a fusion variation on the classic that incorporates Korean kimchi, which adds a bit of heat and a lot of flavor. Use a more mild kimchi if you want less heat, or a spicier kimchi if you want more heat.
Makes 2 servings
Ingredients:
- - 7–8 ounces fresh yakisoba noodles (or about 3.5 ounces dry/uncooked noodles)
- - 1 tablespoon oil (I like using avocado oil)
- - 5–6 ounces (or a heaping 2/3 cup) cabbage kimchi
- - 1 1/2 tablespoons gochujang
- - 2 teaspoons soy sauce
- - 1 tablespoon coconut sugar
- - 2 teaspoons toasted white sesame seeds
- - Garnish: thinly sliced green onions and additional toasted white sesame seeds
Instructions:
- If your noodles aren’t cooked, cook according to the package directions until al dente. If they are fresh noodles, rinse the noodles under warm water to loosen them up.
- Heat the oil in a frying pan or wok over medium heat. Add the kimchi and stir-fry for 1 minute. Then add the gochujang, soy sauce, coconut sugar, and 2 teaspoons of toasted white sesame seeds. Stir-fry for an additional 30 seconds.
- Add the gochujang, soy sauce, coconut sugar, and 2 teaspoons of toasted white sesame seeds. Stir-fry for an additional 30 seconds.
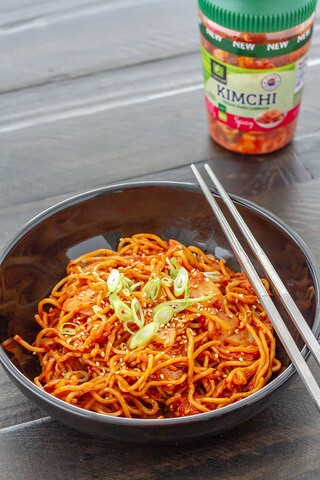
- Add the prepared yakisoba noodles and toss with the kimchi mixture. Stir-fry to heat through, then serve immediately in bowls garnished with thinly sliced green onion and additional toasted white sesame seeds.
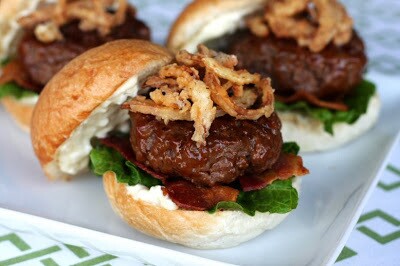
Our Best Bites: BBQ Bacon Sliders with Blue Cheese and Crispy Onions
Ingredients:
For the burgers
- - 1 ½ lb. high-quality 85/15 ground Angus
- - ½ cup BBQ sauce (or your favorite bottled BBQ sauce)
- - ½ tsp. salt
- - ¼ tsp. pepper
- - 8–10 small white dinner rolls or Hawaiian sweet rolls, sliced in half and toasted if desired
- - 8–10 crisp lettuce leaves
- - 8–10 slices bacon, cooked crisp
For the Garlicky Blue Cheese Spread
- - ½ cup mayonnaise
- - ¼ tsp. kosher salt
- - ¼ tsp. freshly ground black pepper
- - 1 Tbsp. red wine vinegar
- - 1 clove garlic, pressed or finely minced
- - ¼ cup crumbled blue cheese (not a blue cheese fan? Leave it out!)
Instructions:
- Garlicky Blue Cheese Spread: Combine mayonnaise, salt, pepper, red wine vinegar and garlic. Mix well and stir in crumbled blue cheese. Store in refrigerator until ready to use.
- Burgers: Heat a grill pan on the stove top, or an outdoor grill to medium-high heat. Combine beef, 2 tablespoons barbecue sauce, salt and pepper. Divide and shape mixture into 8–10 3/4″-thick patties (keep the size of your buns in mind as wells the fact that the burgers will shrink quite a bit while cooking when shaping the patties). Grill for 2–3 minutes and then flip. Brush the top side of each burger with remaining sauce. Continue grilling for another 2 minutes and flip burgers again, brushing the other side with additional sauce. Continue to cook and baste until the internal temperature of the burgers reach 160–165° F.
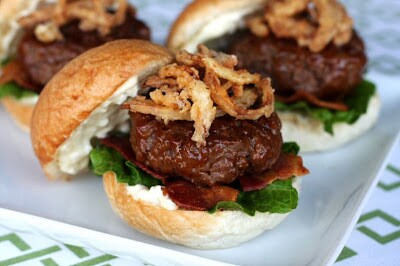
- To assemble: Lightly spread the bottom half of each bun with Garlicky Blue Cheese Spread and top with a lettuce leaf. Break each bacon piece in half and place on top of lettuce leaves. Place burger on top and drizzle with additional barbecue sauce if desired. Top with a small handful of Crispy Shoestring Onions. Spread remaining Garlicky Blue Cheese Spread on top halves of buns.
Lead image from Christy Spackman
